When your PC has a problem, it is always advisable to take
it to a licensed technician to help you figure out and solve the problem. Going
to a technician can sometimes be expensive, and there is still a safe way to
solve problems without spending so much. If you have the 100-disk usage on
Windows 8.1, some apps can assist you with running the diagnostic, and one such
app is my disk app (you can use them for other versions too)
This guide will teach you different methods that you can use
to free up your disk space and prevent it from getting filled up subsequently.
If you use these methods and the problem persists, you can then take it to a
technician for an in-depth check and diagnosis. Here are the ways which you can
use to solve your 100% disk usage on windows:
1. Restart Your System
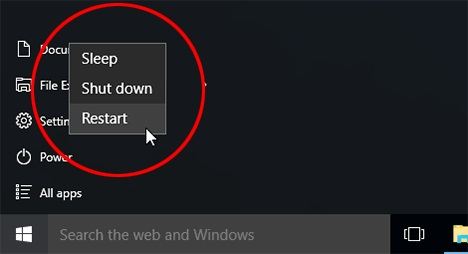
Continually placing your PC on hibernation can lead to a
full disk. If your PC is displaying 100% disk usage, restarting it will allow
you to free up the memory and start again. Avoid consistently placing your
computer on hibernation or sleep mode for extended periods. To restart your
computer, go to the "Start" menu and select the power options.
2. Update Windows
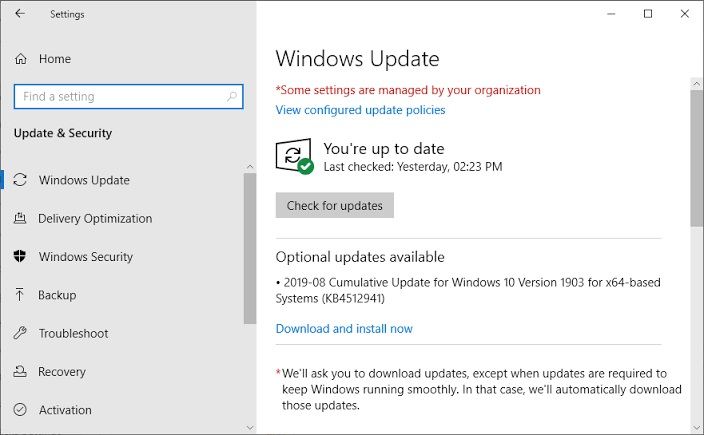
Sometimes all your PC needs are useful old updates. Update
your windows if you are using an older version of windows. Upgrading might be
the silver bullet that will save your PC. Upgrade and check your disk space
right after to see if there is any improvement.
3. Check for Malware
Check your PC for malware as an infection could be the cause
of the full disk. Scan your PC to ensure you do not have any foreign intruders
wreaking havoc on your computer. There are different tools you can use to carry
out this task, including:
Windows Defender
This comes with all PCs running Windows. It is Microsoft's
default security solution, and it will scan your PC for malware and purge them
from your computer.
Go to Settings and click on "Update &
Security" select "Windows Defender,” then open "Windows Defender"
and select "Full.'
Your Main Antivirus
Using a third-party antivirus installed to search for and
remove malware is also possible. If you have a trustworthy and strong antivirus
program installed, use it to scan and eject malware from your PC properly.
4. Disable Windows Search
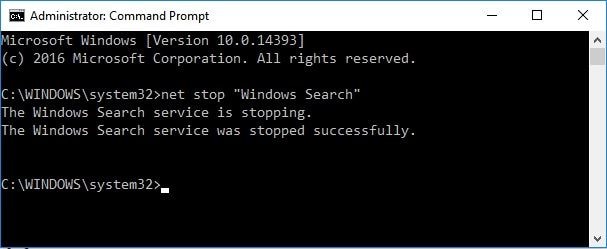
Windows search is a common culprit for stealing disk space
on your PC. If you are trying to save disk space on your PC, you will need to
disable Windows Search. Windows search is a versatile tool because it helps to
fetch files, search for programs, and other cool uses. To disable Windows
Search, you will need to follow these steps:
- Press
Windows Key + X key and click on the "Search box" Type
"cmd" and Right-click Command Prompt, then "Run as
Administrator" and click "Y.es."
- Type
"net.exe stop Windows search” and press "Enter."
You should be able to observe a reduction in the disk usage
now. If the disk remains full, you should turn your search back in for your
convenience.
5. Stop the SuperFetch Service
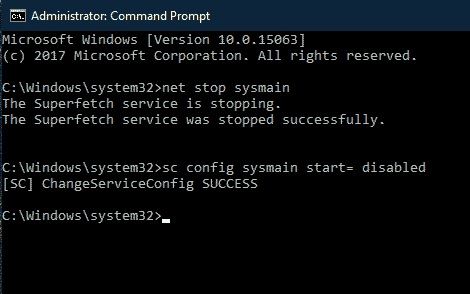
SuperFetch is the feature that helps PCs start up faster by
allowing fast OS booting. Constant use of this feature can lead to 100% disk
usage and slow PC performance. Windows 10 users will need to disable this
feature from their PC. Here is how to disable this problem on Windows 10:
- Press
the Windows Key + X key and then in the Search box, type "cmd."
Right-click "Command Prompt" and "Run as Administrator"
then select "Yes."
- Type
"net.exe stop superfetch" and select the "Enter" key.
With these steps, you should be able to disable the
SuperFetch feature successfully. Check your disk space to ensure it is freed
up.
6. Change Energy Options from Balanced to High
Performance
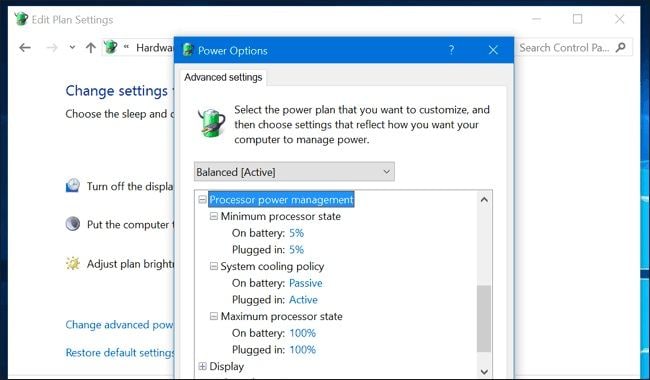
To solve your 100 % disk usage problem, you should try
switching from low or balanced power modes to High performance. Follow these
steps to change to the customized High-Performance plan:
- Go to
the "Start" menu and select the "Control Panel" and
enter "Power Options."
- Select
a battery power plan and change the settings that are currently in use to
High Performance.
- Change
the battery plan settings and turn off the hard disk after.
- This
will prevent your disk from switching to the low power state or powering
down.
7. Temporarily Turn Off Your Antivirus Software
Your computer Antivirus might be responsible for taking up
100% of your computer disk space and resources. To stop this, you will need to
disable the antivirus temporarily to discover if it is responsible for your PC
issues. Do not worry about the safety of your PC as most PCs now come with
Windows Defender so your PC will be protected even when the main Antivirus has
been disabled. If your disk usage reduces while your Antivirus has been
disabled, you should contact the Antivirus customer care and lay a complaint.
They will be able to guide you through the process of solving the issue with a
permanent fix.
8. Reset Virtual Memory in Windows 10
You can reset the virtual memory of your PC to try and solve
the problem. This fix works for Windows 10 100% disk usage problem. To perform
virtual memory resetting, use these steps:
- Press
the Windows key + Pause key (Space bar) and click on "Advanced System
Settings."
- Look
for "Advanced" then enter the "Settings" category. Go
to "Advanced" and select "Virtual memory," then press
"Change."
- Next,
disable the "Automatically manage paging file size for all
drives."
- Select
your windows drive (C: in lost PCs would be different in yours).
- Select
"Initial size" then "Recommended."
- Then
select "Maximum size" and input approximately 1.5 times the size
of your physical RAM (Random Access Memory).
- Save
the new settings.
- Use
Windows key + R key. Type "temp” and then "Enter." Go to
the "Temp folder" and delete the files.
9. Run Check Disk
If you have this 100% disk problem, you should run checks on
your disk to ensure it is not the reason for the problem. If you have tried
other methods that did not work, you should consider trying this one out.
Checking the disk for errors will resolve any issues which might be causing
your PC to give the 100% disk usage warning.
To check for errors, here is the step by step process:
- Press
the Windows Key + X l, in the search box, type "cmd."
- Right-click
the Command Prompt and select "Run as Administrator."
- Click
"Yes" and then type "chkdsk.exe /f /r" and press
"Enter."
- Type
"Y"
- Close
all apps open on your computer and restart it. The disk check will be
performed while it is restarting and before it comes up. This process
usually takes a while to complete, so you will need your PC to be fully
charged and be patient while the process takes place.
10. Change Settings in Google Chrome and Skype
Google Chrome and Skype both have settings that can cause
your drive to work overtime. The Chrome 100 disk usage is common among most
Windows running computers. These settings would need to be addressed to free up
disk space. Here is how to fix these settings:
Google Chrome
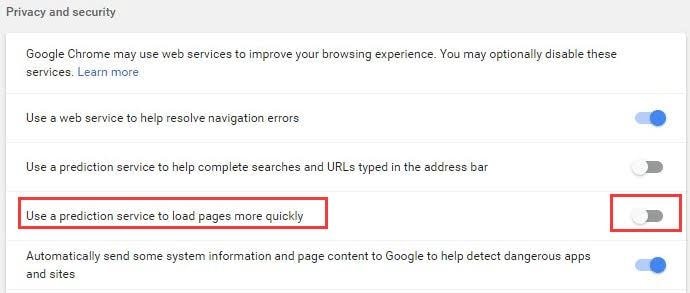
change chrome settings
- Open
the Google Chrome app and click on "Settings" scroll to
"Advanced" and click on it. Then click on "Privacy and
Security."
- Turn
off "Use a prediction service to load pages more quickly." This
will stop your computer from working overtime.
Skype
- Ensure
your Skype is off and not connected to the internet.
- Go to
your drive "C:" enter the "Program Files (x86)" folder
and look for "Skype."
- Click
on "Skype" and look for "Phone." Now right-click
"Skype.exe" and enter into the "Properties" folder.
Look for "Security" and enter the "Edit" section.
- Set
"ALL APPLICATION PACKAGES" to "Write" "Allow” and
then select "Apply" and press the OK button on the screen.
Check your Task Manager to ensure these setting changes have
improved the computer's disk space. You can restart your computer to ensure it
runs smoothly or if you do not see results initially.
Comments
Post a Comment